
Do you crave a delectable treat to satisfy your sweet tooth? Learn how to make irresistible chocolate chip muffins in just a few simple steps. Gather your ingredients and preheat the oven for a baking adventure that will fill your kitchen with mouthwatering aromas. Follow these easy instructions to whip up a batch of moist, fluffy muffins that are perfect for any occasion. Let’s get started!
Gather Your Ingredients
You’ll need to gather all of your ingredients before you start making the chocolate chip muffins. When it comes to ingredient substitutions, if you’re out of one thing, don’t worry! Butter can often be swapped for oil, and different types of milk can be interchanged based on your preferences. For baking tips, remember not to overmix the batter; a few lumps are okay. To add some flavor variations, consider throwing in some chopped nuts or dried fruit along with the chocolate chips. If you want to make recipe modifications, try using whole wheat flour for a nuttier taste or reducing the sugar slightly if you prefer less sweetness. For healthier alternatives, opt for applesauce instead of oil and use dark chocolate chips for added antioxidants.
Preheat the Oven
Before preheating the oven, be sure to check the recipe for the required temperature. Ensuring your oven is set correctly is crucial for baking perfect chocolate chip muffins. Improper heating can lead to uneven baking and affect the texture of your muffins. Once you have confirmed the oven temperature, it’s time to prepare your muffin batter. To achieve a consistent bake with even distribution of chocolate chips, follow these steps:
| Oven Temperature | Baking Time |
|---|---|
| 375°F | 18-20 minutes |
Set your oven to 375°F and allow it to preheat fully. Fill each muffin cup with batter evenly using a spoon or an ice cream scoop for uniformity in size and ensure even distribution of chocolate chips throughout each delicious muffin.
Prepare the Muffin Pan
Once you’ve preheated the oven to 375°F, it’s time to prepare your muffin pan by lining each cup with paper liners for easy removal and a clean finish.
- Baking Tips
- Fill each muffin cup about two-thirds full to ensure the perfect rise while baking.
- Muffin Variations
- Experiment with different add-ins like blueberries, nuts, or even shredded coconut to create unique flavor combinations.
When making chocolate chip muffins, consider using ingredient substitutions like almond flour for a gluten-free option or applesauce instead of oil for a healthier twist. For decorating ideas, sprinkle extra chocolate chips on top before baking or drizzle some melted chocolate over the cooled muffins for an extra touch of sweetness. Enjoy your delicious homemade treats!
Mix the Dry Ingredients
When mixing the dry ingredients for your muffin batter, be sure to whisk together the flour, sugar, baking powder, and salt until well combined. This mixing technique ensures an even distribution of leavening agents and flavors throughout your batter. If you need to make ingredient substitutions due to dietary restrictions or preferences, consider using alternatives like almond flour for a nutty flavor or coconut sugar for a healthier option. The texture of your muffins can vary depending on how long you mix the dry ingredients with the wet ones; overmixing may result in dense muffins instead of light and fluffy ones. Pay attention to the baking time as it can affect both texture and flavor variations such as adding spices like cinnamon or vanilla extract for a twist on classic chocolate chip muffins.
Mix the Wet Ingredients
As you’re mixing the wet ingredients for your batter, ensure that eggs, oil, and any extracts are thoroughly combined to create a smooth consistency. Remember these key points:
- Mixing Technique
- Use a gentle folding motion to incorporate the wet ingredients into the dry mixture effectively.
- Proper Whisking
- Whisk the wet ingredients until they are well blended but avoid overmixing, as it can lead to dense muffins.
When considering ingredient substitutions or adjusting wet ingredient ratios, always maintain the right balance for a moist and delicious outcome. Additionally, be mindful of the temperature of your ingredients; using room temperature items ensures even distribution and better incorporation into the batter.
Combine Wet and Dry Mixtures
Before baking, ensure you thoroughly combine the wet and dry mixtures to achieve a uniform batter consistency. When mixing, use gentle folding motions rather than vigorous stirring to prevent overmixing, which can lead to dense muffins. If you’re considering ingredient substitutions, try using Greek yogurt instead of buttermilk for added tanginess. Troubleshooting tips include adjusting the oven temperature if your muffins are browning too quickly or not baking evenly. For flavor variations, experiment with adding orange zest or a dash of cinnamon for a unique twist on traditional chocolate chip muffins. Remember that baking time adjustments may be needed based on your oven’s specific characteristics, so keep an eye on them as they bake to achieve that perfect golden hue.
Add Chocolate Chips
After ensuring the batter is well mixed, gently fold in some chocolate chips for a delicious addition to your muffins. When it comes to chocolate chip varieties, you can choose from classic semi-sweet, dark chocolate for a richer flavor, or white chocolate for a sweeter touch. For baking tips:
- Mixing Technique:
- Incorporate the chocolate chips last to prevent them from sinking to the bottom of the muffin.
- Distribution:
- Ensure an even distribution of chocolate chips throughout the batter for consistent flavor in every bite.
When deciding between sweet vs. savory muffins, consider adding ingredients like bacon or cheese for a savory twist. Experiment with ingredient substitutions like using applesauce instead of oil for healthier muffins. Finally, explore fun muffin topping ideas such as streusel crumbles or a drizzle of glaze!
Fill the Muffin Cups
Distribute the batter evenly among the muffin cups before baking. Depending on the muffin cup sizes, you may need to adjust the amount of batter you pour in. Remember, if you’re using alternative fillings like blueberries or nuts, make sure they are distributed evenly throughout each cup. Preheat your oven to the recommended baking temperature to ensure your muffins cook perfectly. Be cautious of overfilling risks; filling them too much can cause spillage and misshapen muffins. Once baked, get creative with decorative toppings like a sprinkle of cinnamon sugar or a drizzle of melted chocolate. These finishing touches not only add flair but also enhance the deliciousness of your homemade chocolate chip muffins!
Bake the Muffins
Now that you’ve filled the muffin cups, it’s time to bake the muffins. This step is crucial for achieving perfect chocolate chip muffins. Remember these baking techniques to make your muffins turn out just right:
- Baking Techniques
- Preheat the oven for even baking.
- Rotate the pans halfway through baking for uniform browning.
When it comes to muffin variations and flavor combinations, feel free to get creative with add-ins like nuts or different types of chocolate chips. Additionally, if you need ingredient substitutions due to dietary restrictions or preferences, consider using alternatives like almond milk or gluten-free flour blends. Lastly, here are some troubleshooting tips to keep in mind while baking:
- Troubleshooting Tips
- If your muffins are browning too quickly, tent them with foil.
- To prevent dryness, avoid overmixing the batter.
Check for Doneness
Ensure you insert a toothpick into the center of the muffins to check for doneness before removing them from the oven. This simple method helps you determine if your chocolate chip muffins are perfectly baked or need a little more time. The toothpick should come out clean with perhaps a few moist crumbs attached, indicating that the muffins are ready to be taken out of the oven. Apart from the doneness test, keep an eye on visual cues like golden-brown tops and sides. Additionally, use a temperature check with an oven thermometer for accuracy and rely on time indicators as a general guide. Here’s a helpful table to summarize these key points:
| Doneness Test | Toothpick Method | Visual Cues |
|---|---|---|
| Clean toothpick = Done | Insert in center | Golden-brown color |
| Moist crumbs okay | Check for crumbs | Lightly springy tops |
| Wet batter = Not done | Look for wet batter | Slightly pulling away |
Cool and Enjoy
After removing the baked goods from the oven, let them cool on a wire rack before indulging in your delicious treat. When it comes to enjoying your chocolate chip muffins, consider these suggestions:
- Serving Suggestions
- Warm them up slightly and serve with a dollop of whipped cream for an extra indulgent touch.
- Chocolate Chip Variations
- Experiment with different types of chocolate chips like dark chocolate, white chocolate, or even caramel-filled ones for unique flavors.
When storing your muffins, keep them in an airtight container at room temperature for up to three days. For longer storage:
- Freeze any extras by placing them in a freezer-safe bag. They can last for up to three months.
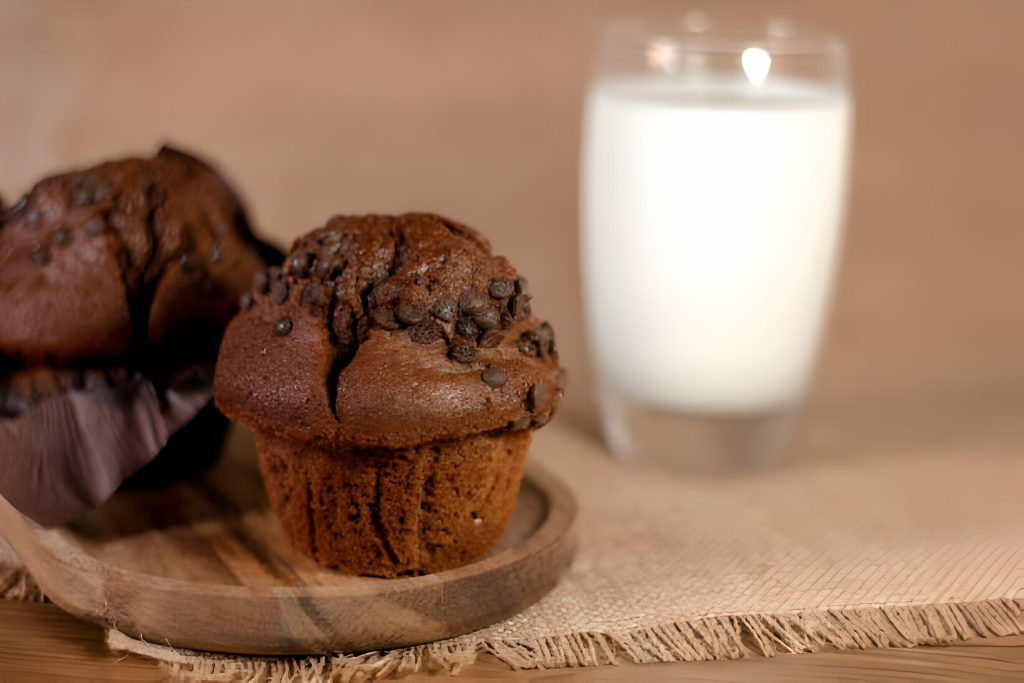
Pair these delightful treats with a cup of coffee or a glass of cold milk for the perfect snack experience.
Store Leftover Muffins
When storing your leftover treats, remember to keep them in an airtight container at room temperature for up to three days. To extend the muffins’ shelf life, you can freeze them for future enjoyment. Here are some tips and tricks for preserving your delicious chocolate chip muffins:
| Storing Tips | Freezing Options | Reheating Methods | Best Containers |
|---|---|---|---|
| Store in airtight container | Freeze individually wrapped muffins | Microwave briefly or heat in oven | Use plastic containers |