
Imagine the moment when you sink your teeth into a luscious chocolate-covered Oreo, the perfect marriage of crunch and creaminess. But how do you achieve that flawless chocolate coating that makes every bite a heavenly experience? Let’s uncover the secrets to mastering the art of crafting these irresistible treats, from selecting the finest chocolate to mastering the dipping technique. Your journey to creating the ultimate chocolate-covered Oreos begins here, where precision meets indulgence in a few simple steps.
Ingredients and Tools Required
To create delicious chocolate-covered Oreos, gather your supplies including Oreo cookies, chocolate for melting, sprinkles, a large baking sheet, and a microwave-safe bowl. When it comes to chocolate coating techniques, remember to melt the chocolate in the microwave, ensuring it is smooth and ready for dipping. Experiment with flavor variations by trying different types of chocolate like dark, milk, or white for a unique twist. For decorating options, consider adding sprinkles, cookie crumbles, nuts, or even candy pieces to enhance the look and taste. When it comes to storage solutions, store your chocolate-covered Oreos in an airtight container at room temperature for up to four weeks, or in the fridge if using untempered chocolate. For presentation ideas, consider serving these treats with hot chocolate or milk, using them as toppings for cakes or cheesecakes, or even making Oreo pops with lollipop sticks for a fun twist. Enjoy the delightful process of creating and savoring your homemade chocolate-covered Oreos!
Preparing the Baking Sheet
Begin by lining your baking sheet with parchment paper to prepare for the chocolate-covered Oreos. This step is crucial to ensure that your delicious treats don’t stick to the surface and can be easily removed once they have set. When it comes to decorating options, consider sprinkles, cookie crumbles, nuts, or even candy pieces to add a touch of creativity to your chocolate covered Oreos. Experiment with different coatings like white chocolate, dark chocolate, or even colored candy melts for a variety of flavors. For flavor combinations, try pairing classic Oreo cookies with milk chocolate for a traditional taste or mix things up with different Oreo flavors and chocolate types. When thinking about presentation ideas, consider using chocolate transfer sheets for intricate designs, adding a personal touch with a monogram, or exploring various toppings to enhance the overall look. Finally, if you plan to gift your chocolate-covered Oreos, think about creative gift packaging ideas to make your treats even more special.
Melting the Chocolate
After preparing the baking sheet with parchment paper for your chocolate-covered Oreos, the next step involves melting the chocolate to create a smooth and delectable coating. To begin, choose high-quality chocolate for the best results. You can opt for chocolate candy melts, Ghirardelli wafers, or even chocolate chips with a bit of coconut oil for a glossy finish. In terms of flavor combinations, consider using different chocolate variations like semi-sweet, milk, or white chocolate to suit your taste preferences. When melting the chocolate in a microwave-safe bowl, heat it in short intervals, stirring in between to avoid burning. If the chocolate needs thinning, add a small amount of coconut oil. Once the chocolate is velvety and free of lumps, you are ready to dip your Oreos. This step sets the foundation for your decorating techniques, from adding sprinkles to exploring various toppings for an enticing presentation that will surely impress your guests.
Dipping Oreos in Chocolate
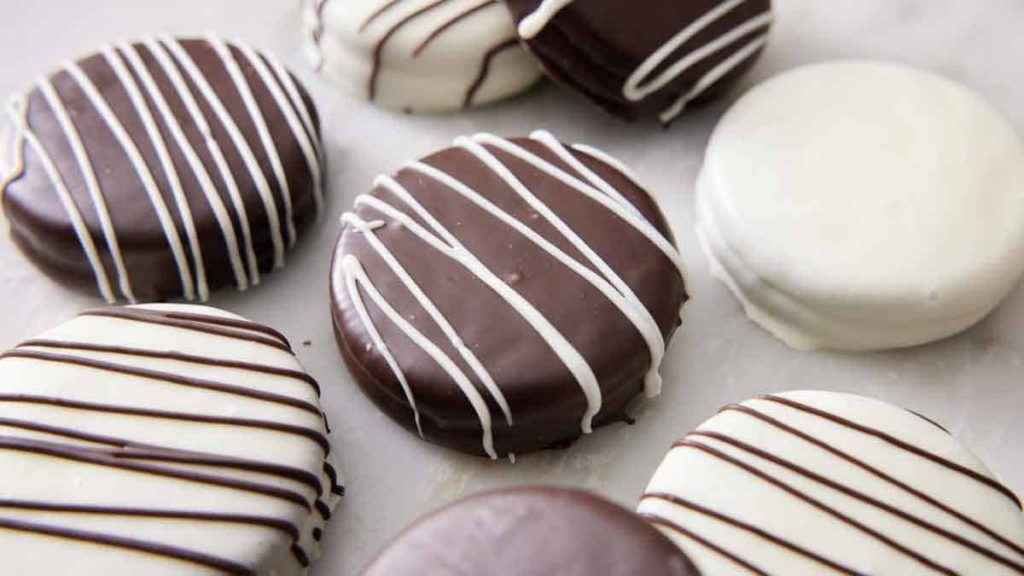
Prepare your Oreos for a delectable transformation by immersing them in velvety melted chocolate. Begin by melting your preferred chocolate in a microwave-safe bowl, ensuring a smooth and creamy consistency. Dip each Oreo into the luscious chocolate, using a fork to coat it evenly. Be creative with flavor combinations like dark chocolate with sea salt or white chocolate with crushed peppermint. Explore various dipping techniques such as half-dipping for a stylish presentation or fully coating for an indulgent treat.
To enhance your chocolate-covered Oreos, consider adding creative decorations like colorful sprinkles, crushed nuts, or edible glitter. These additions not only offer a pop of color but also elevate the texture and taste. For a festive presentation, adorn your Oreos with seasonal motifs or themed designs using chocolate transfer sheets. Experiment with different chocolate tempering methods to achieve a glossy finish that snaps when bitten into.
Elevate your chocolate-covered Oreos with personalized touches, making them a delightful treat for any occasion.
Removing Excess Chocolate
To remove excess chocolate from your chocolate-covered Oreos, gently tap the fork against the edge of the bowl to allow the extra chocolate to drip off smoothly. This step is crucial in achieving a clean and polished look for your treats. Here are some detailed tips and techniques to ensure your Oreos turn out perfectly:
| Decorating Techniques | Chocolate Coating | Excess Chocolate Removal |
|---|---|---|
| Add sprinkles, nuts, or cookie crumbles for extra flair | Use high-quality chocolate for a smooth finish | Tap the fork against the bowl edge to let excess chocolate drip off smoothly |
| Sprinkle Options | Dipping Tips |
|---|---|
| Choose from a variety of sprinkles for different looks | Reheat chocolate if needed for better consistency |
Allowing Cookies to Set
Once the chocolate-covered Oreos have been dipped and excess chocolate removed, the next step is to allow the cookies to set on the lined baking sheet until the chocolate hardens and forms a smooth finish. This process is crucial for ensuring your chocolate-covered Oreos have that perfect texture and appearance. Here are some creative ideas to make your chocolate-covered Oreos even more special:
- Decorating Options: Experiment with different types of sprinkles, edible glitter, or drizzles of contrasting chocolate to add a pop of color and texture.
- Customization Ideas: Personalize your Oreos with initials, themed decorations, or even small edible flowers for a unique touch.
- Flavor Combinations: Try pairing different flavored Oreos with complementary chocolate coatings like dark chocolate with mint Oreos or white chocolate with red velvet Oreos for a delicious twist.
- Gift Packaging: Present your chocolate-covered Oreos in decorative boxes, bags, or jars tied with ribbons for a thoughtful and visually appealing gift presentation.
- Creative Displays: Showcase your chocolate-covered Oreos on tiered trays, in elegant glass jars, or as part of a dessert table for a visually stunning dessert presentation that will impress your guests.
Pro Tips for Success
For optimal results when making chocolate-covered Oreos, consider these expert tips to elevate your treat-making experience. When selecting chocolate, opt for high-quality options like Wilton Candy Melts, Ghirardelli wafers, or even almond bark for a unique flavor. Experiment with different chocolate types such as semi-sweet, milk, or white to suit your taste preferences. When it comes to decorative toppings, get creative by adding sprinkles, cookie crumbles, nuts, or candy pieces to enhance the look of your Oreos.
Master your dipping techniques by ensuring the chocolate is properly melted and at the right consistency. Use coconut oil or vegetable shortening to thin the chocolate if needed, and remember to tap the fork to remove excess chocolate for a smooth finish. For flavor variations, consider incorporating different Oreo flavors like mint or peanut butter to add a twist to your chocolate-covered Oreos. Lastly, for storage tips, keep your treats fresh by storing them in an airtight container at room temperature or in the fridge if using untempered chocolate.
Serving and Storing Suggestions
Consider incorporating a touch of elegance by presenting your chocolate-covered Oreos on a decorative serving platter or tiered dessert stand. To enhance your serving experience, here are some creative suggestions:
- Creative toppings: Sprinkle crushed nuts, colorful sprinkles, or edible glitter on top for a festive touch.
- Festive decorations: Use themed decorations like edible flowers, seasonal candies, or themed picks to match the occasion.
- Flavor variations: Experiment with different chocolate types such as dark, milk, or white chocolate for unique flavors.
- Storage tips: Keep your chocolate-covered Oreos fresh by storing them in an airtight container at room temperature for up to four weeks or refrigerating if using untempered chocolate.