
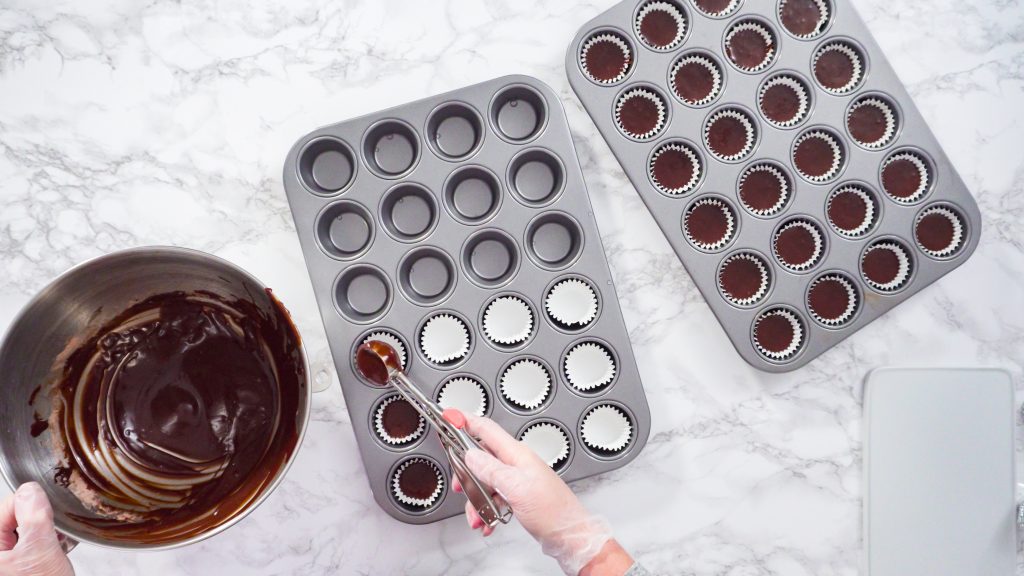
To make a chocolate mold, start by cleaning and polishing the mold with cocoa butter, ensuring a glossy finish. Chop chocolate into small pieces and melt it using a double boiler or microwave, stirring gently to avoid bubbles. Pour the melted chocolate into the mold slowly, tapping out air bubbles and scraping off excess for a clean edge. Let the chocolate set, then decorate with sprinkles or nuts. Store your chocolates in a cool, dry place and explore more techniques to enhance your chocolate creations.
Chocolate Molding Techniques
To master chocolate molding techniques, understanding the proper methods for pouring tempered chocolate into molds is crucial for achieving professional and flawless results. Mold decorating plays a significant role in creating visually appealing chocolates. You can customize your chocolates by selecting molds that suit the occasion or theme, allowing for intricate chocolate shapes that impress. When it comes to chocolate design, remember to apply mold release before pouring the melted chocolate to ensure easy mold release. Proper mold maintenance is essential for prolonging the lifespan of your molds. Regular cleaning and storage in a cool, dry place help preserve the quality of your molds. By paying attention to these details, you can elevate your chocolate molding skills and produce beautifully designed chocolates every time.
Choosing the Right Chocolate for Molding
When selecting chocolate for molding, prioritize high cocoa butter content to ensure ideal results in your chocolate creations. Opt for couverture chocolate, such as commercial options like Valrhona and Callebaut, known for their rich taste and smooth texture. Consider the flavorings in the chocolate as they can enhance the overall taste of your creations. Temperature control is crucial when melting chocolate; use methods like microwaving for bars or double-boiling for couverture chocolate to ensure proper consistency. The cocoa butter content in the chocolate plays a significant role in how well it sets in the molds, affecting the final outcome. Choose mold designs that suit your preferences and intended shapes, ensuring they are suitable for the type of chocolate you are using. By paying attention to these factors, you can set the foundation for successful chocolate molding projects.
Troubleshooting Chocolate Molding Issues
If you encounter chocolate sticking to your molds, consider adjusting the temperature to troubleshoot common molding issues. Here are some tips to help you resolve common problems:
- Preventing sticking: Ensure your molds are clean and dry before pouring in the chocolate. Grease or moisture can lead to sticking issues.
- Temperature control: Keep your chocolate at the right temperature throughout the molding process. Properly tempered chocolate will set correctly and release from the molds easily.
- Correcting dullness and streaks: If your chocolates appear dull or have streaks, it could be due to improper tempering. Reheat and cool the chocolate following tempering guidelines to achieve a smooth, glossy finish.
If you encounter stubborn sticking, try placing the mold in the freezer for a few minutes. The cold temperature can help the chocolate contract and release from the mold more easily. By addressing these issues, you can create beautifully molded chocolates without any hitches.
Utilizing Leftover Chocolate
How can you creatively repurpose leftover chocolate to avoid wastage and explore new culinary possibilities? Don’t let that extra chocolate go to waste! Consider repurposing it with innovative uses and creative recipes. One idea is to make chocolate bark by melting the leftover chocolate and mixing in nuts, dried fruits, or even pretzels before spreading it out to cool. Another option is to create chocolate truffles by rolling the melted chocolate into small balls and coating them with cocoa powder, coconut flakes, or crushed nuts. You could also use the leftover chocolate as a drizzle or dip for fresh fruits, marshmallows, or cookies to add a decadent touch. By thinking outside the box and maximizing leftovers, you not only reduce waste but also unlock a world of new flavors and textures to enjoy. Get inspired and experiment with different ways to repurpose your chocolate for a delicious and sustainable treat.
Understanding Chocolate Properties
Understanding the properties of chocolate involves delving into the intricate interplay of chocolate particle size, textures, and the role of natural emulsifiers like lecithin that impact the overall taste and mouthfeel experience.
- Chocolate Texture: The particle size of chocolate significantly influences its texture. Finely ground particles result in a smoother, melt-in-your-mouth feel, while larger particles can create a more gritty or uneven texture.
- Cocoa Butter Content and Melting Properties: The cocoa butter content in chocolate affects its melting point and mouthfeel. Higher cocoa butter content often leads to a richer, creamier texture and quicker melting properties.
- Lecithin Effects on Mouthfeel: Lecithin, a natural emulsifier found in chocolate, plays a crucial role in enhancing the smoothness and mouthfeel of chocolate. It helps bind ingredients together, resulting in a velvety texture that lingers on the palate.
When comparing homemade and store-bought chocolates, pay attention to these factors to discern quality differences in taste, texture, and overall chocolate experience.
Types of Chocolate Molds
When exploring the world of chocolate molding, the variety of chocolate molds available can inspire creativity and elevate your confectionary creations to new heights. Mold customization allows you to craft unique shapes and sizes, while mold cleaning ensures a pristine surface for your chocolates. Proper mold storage in a cool, dry place is essential for maintaining the integrity of your molds over time. Regular mold maintenance, such as rinsing with soapy water and scraping off excess chocolate, prolongs their lifespan. Mold selection is crucial, with options ranging from clear/translucent plastic for easy monitoring to sturdy polycarbonate molds that preserve intricate designs. Consider choosing molds with various shapes like round, truffle, break-apart, hearts, and roses molds to add diversity to your chocolate creations. Each mold material, whether plastic, polycarbonate, or silicone, offers unique benefits for different molding needs. Experiment with different molds to discover the perfect fit for your chocolate-making endeavors.
Material Specifics for Chocolate Molds
To delve into the intricacies of chocolate mold materials, consider the unique benefits each type offers for your confectionary creations.
- Clear Plastic Molds:
- Lightweight material ideal for easy candy shaping.
- Perfect for intricate and delicate designs.
- Ensure mold cleaning by rinsing with soapy water while chocolate is still melted.
- White Plastic Molds:
- Best suited for simple confections.
- Creates classic and elegant chocolate treats.
- Proper mold storage requires a cool, dry place with a temperature between 55-70°F.
- Polycarbonate Molds:
- Sturdier and heavier than plastic molds.
- Preserves the shape and integrity of chocolates.
- Essential mold maintenance includes avoiding storing chocolate in the refrigerator and opting for plastic airtight containers for storage.
Each material has its strengths in mold customization, but remember to maintain the correct mold temperature to ensure the best results for your chocolate creations.
Chocolate Making Ingredients and Tools
For crafting delectable chocolates, sourcing high-quality ingredients and utilizing essential tools is paramount to achieving exceptional results. When it comes to chocolate making, selecting the right type of chocolate is crucial. Opt for quality couverture chocolate rich in cocoa butter for the best taste and texture. Dark, milk, or white chocolate discs are ideal for molding, with vegan and plant-based options also available. Essential tools for chocolate making include a candy thermometer, spoons, spatulas, pastry bags, squeeze bottles, a marble slab for tempering, and a kitchen towel for spills.
Tempering tips are essential for achieving that perfect glossy finish and snap in your chocolates. Explore different melting methods such as the double boiler, marble tabletop, or microwave method to find what works best for you. Experiment with unique flavor combinations, decorative designs, and innovative storage solutions to elevate your chocolate creations. Remember, attention to detail and using the right ingredients and tools will help you craft professional-quality chocolates every time.