
Do you ever crave a sweet and juicy treat that also satisfies your chocolate cravings? Well, look no further because learning how to make chocolate covered fruit will be a game-changer for your dessert game. With just a few simple steps, you can create a delicious and elegant snack that is perfect for any occasion. So, grab your favorite fruits and get ready to indulge in this delightful combination of flavors!
Choosing the Best Fruit
When picking fruit for chocolate dipping, make sure you select options that are ripe and firm. Opt for fruits like strawberries, bananas, or dried apricots for a delicious treat. Experiment with different flavor combinations such as dark chocolate with raspberries or white chocolate with blueberries to create unique taste experiences. Consider seasonal options like using watermelon in the summer or apples in the fall for variety. For presentation ideas, try skewering fruit pieces on bamboo sticks or arranging them in an aesthetically pleasing pattern on a platter. Not only is indulging in chocolate-covered fruit a delightful experience, but it also offers health benefits from the vitamins and antioxidants present in the fruits themselves.
Preparing Your Chocolate
Before starting the process, remember to melt your chocolate in a double boiler for a smooth consistency. Different chocolate types like dark, milk, or white require specific tempering techniques to achieve that perfect shine and snap. Using a double boiler helps prevent overheating and ensures even melting. If you prefer a quicker method, the microwave can also be used with caution not to burn the chocolate. When tempering, it’s crucial to monitor the temperature accurately with a chocolate thermometer to reach the ideal range for each type of chocolate. Whether you choose the traditional double boiler or opt for the microwave method, mastering these tempering techniques will elevate your chocolate-covered fruit game to new heights of deliciousness!
Washing and Drying the Fruit
To ensure the best results, it’s important to thoroughly wash and dry your chosen fruits before dipping them into the melted chocolate. Proper rinsing helps remove any dirt or residue from the fruit’s surface, ensuring cleanliness. Thorough drying is essential to avoid excess moisture on the fruit, as this can cause the chocolate to seize or not adhere properly. After rinsing, pat the fruits gently with paper towels to remove any remaining water droplets. Remember, cleanliness plays a crucial role in creating delicious chocolate-covered fruit treats. So take that extra step to wash and dry your fruits meticulously before indulging in the delightful process of dipping them into velvety melted chocolate for a decadent treat!
Melting the Chocolate
Once the chocolate is completely melted, you can begin dipping your prepared fruits for a delectable treat. To ensure the perfect chocolate consistency and avoid clumps, consider these tips:
- Double Boiling:
- Use a heatproof bowl over simmering water to melt the chocolate gently.
- Stir occasionally to prevent overheating and ensure even melting.
- Mixing Techniques:
- Use a spatula or whisk to mix the chocolate for a smooth texture.
- Avoid using wooden spoons as they can introduce moisture and affect the tempering process.
Dipping the Fruit
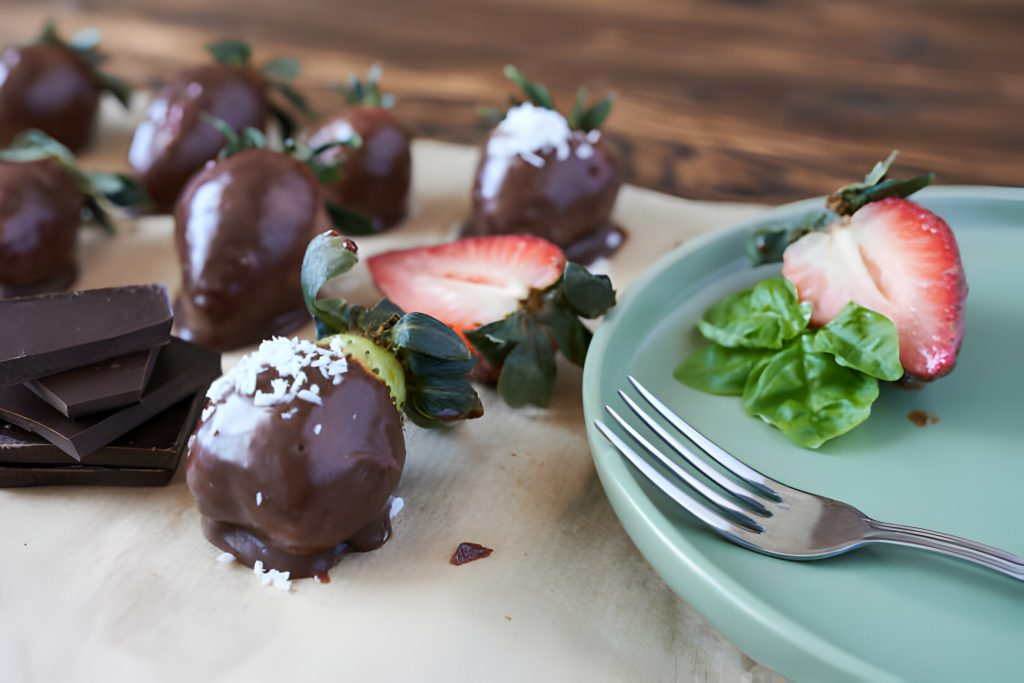
As you dip the prepared fruits into the melted chocolate, ensure each piece is evenly coated for a delicious finish. Fruit selection plays a crucial role in creating delectable chocolate-covered treats. Opt for firm fruits like strawberries, bananas, or pineapple that hold up well to the dipping process. Experiment with different flavor combinations by adding a sprinkle of sea salt, chopped nuts, or shredded coconut on top of the chocolate coating. When it comes to presentation ideas, consider arranging the dipped fruits on a decorative platter or wrapping them individually as gifts. To master dipping techniques, use a fork to submerge each fruit piece fully in the chocolate before gently tapping off excess and placing them on parchment paper to set.
Decorating Your Chocolate Covered Fruit
Now that you’ve mastered dipping the fruit in chocolate, it’s time to take your creations to the next level by decorating them. Get ready to impress with creative designs and flavor combinations that will elevate your chocolate-covered fruit game! To make your treats truly stand out, consider adding edible garnishes and perfecting your presentation tips. Here are some ideas to inspire you:
- Creative Designs
- Use different colored chocolates for a vibrant array of fruits.
- Experiment with various textures like crushed nuts or sprinkles.
- Flavor Combinations
- Try contrasting flavors like salty pretzel bits on sweet strawberries.
- Mix and match fruits with complementary tastes for a delicious twist.
Don’t forget the final touch – a beautiful chocolate drizzling over your masterpiece!
Allowing the Chocolate to Set
Allow the chocolate-covered fruit to cool completely before adding any decorations. Setting time aside for the chocolate to set is of utmost importance when making chocolate covered fruit. Ideally, let the fruit sit at room temperature until the chocolate hardens. If you’re short on time, refrigerating the treats can speed up the process. However, patience is still needed as rushing could cause the chocolate to not set properly or result in a dull appearance. To test readiness, lightly touch the surface of the chocolate with your finger; it should feel firm and no longer tacky. Once fully set, you can proceed with decorating your delicious chocolate-covered fruit however you desire!
Serving and Storing Your Chocolate Covered Fruit
Ensure your tasty treats are stored in an airtight container in the refrigerator to maintain freshness and flavor. When serving your chocolate-covered fruit, consider these tips:
- Storage Tips:
- Keep them refrigerated to prevent melting.
- Consume within 2-3 days for the best taste.
- Serving Suggestions:
- Pair with a glass of champagne for an elegant touch.
- Arrange on a platter with fresh mint leaves for a pop of color.
For presentation ideas, try displaying them on a tiered dessert stand or individually wrapping them in colorful cellophane with ribbons. Experiment with different flavor combinations like dark chocolate with orange slices or white chocolate with strawberries. Get creative by adding toppings such as chopped nuts or edible glitter for that extra special touch.